Revolutionizing the Live Stream – Part 2
Streaming Video 101
This post is the second in a four-part series about Rose City Rollers’ effort to re-invent how it presents our bouts to our fans and members.
In the first piece, Jonathan and Dennis described what the process of building a program for Rose City Rollers’ new boutcasting system was like, to include the discussion of some of the design principles that guided their work. This installment of the series is about understanding the different pieces of the system.
The Basics
Your league needs five things to stream its bouts:
- One or more cameras
- Cables to connect the camera(s) to a computer
- A Computer
- Software
- A connection to the Internet
What’s important to remember is that any system you build does not need to be outrageously expensive to be awesome: you can put together a one-camera system to broadcast in 1080p using a smart phone or GoPro, a tripod or some other mount, a USB 3.0 cable, and someone’s laptop. Will it be comparable to broadcast TV? No. Even with five cameras, Rose City’s system falls well short of broadcast TV…but you can still create a pretty awesome, professional-looking viewing experience with what your league likely has access to.
Camera(s)
Filming roller derby requires a camera that can contend with high-speed athletes, be able to focus up close and far away, and be able to manage complicated lighting situations.
We started with webcams: they’re affordable, easy to use, and simple for a computer to handle. What we quickly discovered is that webcams are designed to record you sitting in chair in front of your computer: when recording derby, we encountered unacceptable amount of motion blur and the cameras failing to focus as the pack moved around the track.
At the other end of the spectrum are the professional video cameras operated by a person. These cameras are usually designed to operate with a full broadcast studio system. You can connect SDI cameras to a PC, but you’ll probably need a dedicated operator for each camera (The Big O Tournament rents these types of cameras and has an amazing team of folks running multiple cameras on each track and pulling all the feeds together in their PC-based production area) or a higher-end video production backend.
During our testing period, we used a used GoPro to test out our ideas and we were happy with its balance between video quality and ease of use. GoPros are designed for action sports and are made for a first-person view of the athlete, but they manage high-speed objects quite well and they can focus both near and far. A GoPro will require a converter to take the HDMI signal from the camera and convert to USB for the PC. The exciting thing for us was that we could use a remote control to power all the cameras without having to climb a ladder to power things on and off.
Tip: To make for a more “normal” viewing experience, you can set the camera to 2.7K or lower like we did to eliminate the fish-eye effect many athletes use to capture a wide field-of-view.
Cable(s)
Do not underestimate the importance of cables.
Your choice when it comes to connection options are simple: USB or SDI cables.
With USB, you can connect webcams and some smartphones, or use converters to accept HDMI camera sources. USB has a maximum reach of 15 feet by default, by the time you run that cable around your computer, across the table and over to a boom holding your camera, the camera does not get far from you.
To extend beyond the default 15 feet, you will need Active USB cables. The cable we used in testing cost $80 for 32 feet.
For best results, use a USB3.0 port on your computer (which produces more power than older USB versions,) and make sure you have no more than five connection hops between the computer and the camera (i.e., PC to USB cable = first hop, cable to HDMI converter = second hop, converter to HDMI cable = third hop, HDMI cable to camera = fourth hop.) This limitation often means that your operational distance might be shorter than you had hoped; even under the best of circumstances, 100 feet of cable between the computer and the camera will be challenging.
Your computer will only accept 2-3 USB cameras. This is a limitation of the motherboard. Some high-end (expensive) PCs can accept upwards of 6 USB cameras. This is a limit of the PCI BUS.
SDI cables allow for far greater distances. You will need a desktop-style PC and you will have to install a PCIe SDI card to make everything work. Most SDI cards accept one or two cameras, but some can accept four or more. These cards can be cost-prohibitive as the number of connections increase.
Unless you have the studio-quality cameras, you will need a converter to change your camera’s output to SDI, but once done, SDI cables can transmit video two to three hundred feet.
Bottom line: if you are only managing a couple cameras and can keep them close to the PC, go with USB connections. If you want to span the track, or connect more than a couple cameras, consider the upgrade to a desktop PC with SDI card.
Computer
We did most of our testing with laptops and quickly found ourselves hitting the machines’ limits.
A standard, off-the-shelf, mid-range laptop ($500-$800) can handle a single camera no problem, probably two at 1080p resolution. Webcams are less taxing on the system so you may be able to run three, but GoPros with converters require more resources, expect only one GoPro at 4K resolution or two at 1080p (this still will make for a great boutcast).
We did most of our testing on a $2000+ gaming-class laptop, with dedicated graphics card. Despite being a couple years old, the machine handled three USB connected cameras with ease, two at 1080p, one at 4K. A dedicated graphics card, even an older model (GTX 1070 for us), changes your limits.
 For the production system, we went with a $1500 gaming desktop: the processing power needed for several camera feeds and live streaming a stable 1080p video is near the same as for video games. At the time of writing, we suggest that you look for an Intel Core i7 or i9 processer, or AMD Ryzen 7 or 9 series, an Nvidia RTX 2070 or 2080, aim for at least 16GB of RAM, and ensure that you are using a high-speed SSD. We recommend a PCIe NVMe M.2 SSD with minimum write speed of 1500Mbps.
Software
There are a few choices available to you in terms of software, we use and recommend Open Broadcaster Software (which we learned of through Chad at NERDerby’s excellent talk), but you can also look at an off-shoot of OBS called Streamlabs OBS, a competitor called Xsplit, or a paid service called Livestream Studio from Vimeo.
OBS is free software with a robust community of users willing to help out if you hit a snag. Streamlabs OBS uses OBS as its core, then simply overlays features that are great for gaming streamers.
Xsplit operates much the same as OBS but has a $5/month subscription fee. Finally, Livestream Studio has a $75/month fee, but offers powerful multi-casting and monetization options.
The free software allows you to stream to a single platform, the paid software allows you to stream to multiple platforms simultaneously.
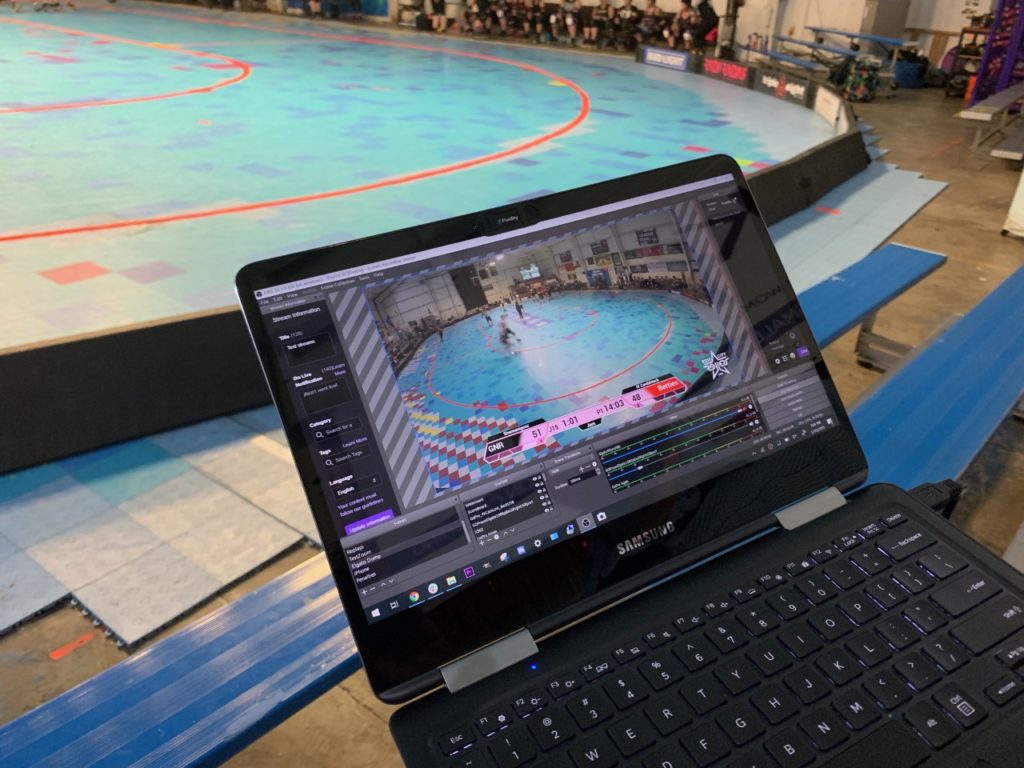
All of the services allow you to create multiple “scenes.” A scene can contain a camera shot and a scoreboard overlay, for example. Or a camera shot and the roster. You can add additional elements to a scene, but a camera shot, the scoreboard, and your league’s watermark are a good start.
In terms of the scoreboard, Rose City—like many leagues—uses CRG. Chat with your officiating crew to see what you are using. The nice thing about CRG is that it outputs a dedicated webpage that can be easily accepted into OBS into your scenes.
Connection to the Internet
No matter how many cameras you have going into your computer, you only need one connection from the computer to the Internet. It’s important to have a fast, reliable internet connection…and you may want to consider apportioning your router to ensure that the stream is not impacted by fans, etc.
YouTube recommends 3,000 – 6,000 Kbps for a 1080p video stream. When you factor in internet traffic, that means your stream will push about 4 – 7 Mbps of upload traffic (1 Mbps = 1,000 Kbps). The average Comcast home internet plan is 5 Mbps upload speed so you can see how quickly you might hit provider limits. Exceeding the limit can cause stutters, lag, and dropped connections.
Check with your provider to make sure that you have the data speeds that you need, and don’t forget about all of the other services active in your facility when you calculate your needs. Playing it safe, we recommend an internet plan that at least doubles the upload data speeds you expect, and don’t let your provider confuse you with super high download speeds. Download speeds are important, true, but upload speeds are what make or break a broadcast.
###
Up next: diving deeper on some of the technical issues associated with a boutcast!
